



Mini Excavator in Wet Conditions — Mud, Soft Ground, and Waterlogged Sites
Wet ground is where mini excavators earn their operators the most money and lose their owners the most time. The same machine that grades a dry sub-base in three hours can spend three hours attempting to extract itself from a waterlogged clay site that it entered without adequate assessment. The difference between those two outcomes is not the machine — it is the preparation, the track specification, and the operating technique applied when conditions are saturated.
This article covers the practical factors: ground pressure specification, track selection for soft ground, mud bucket technique, machine entry and exit procedure, and what to do when the machine gets stuck.
Ground Pressure — Why the Number Matters
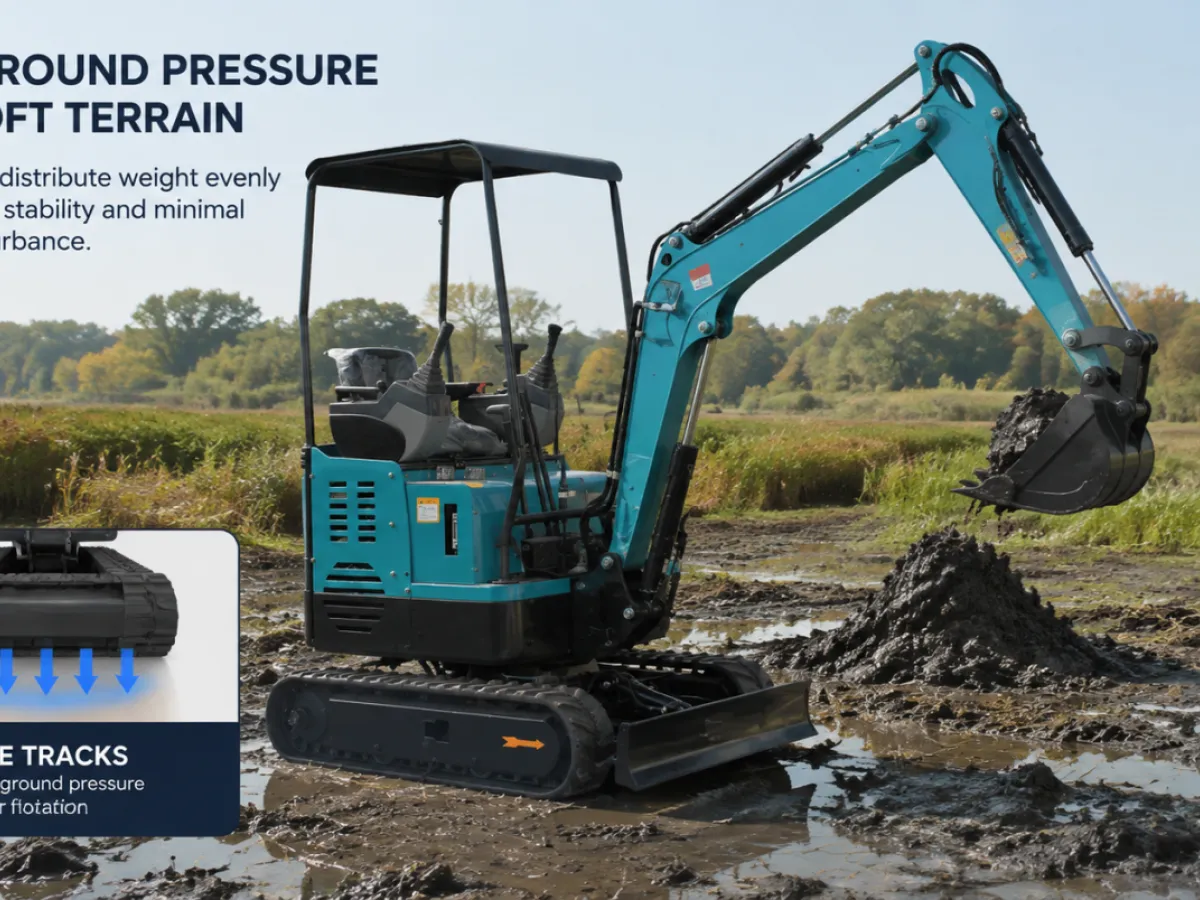
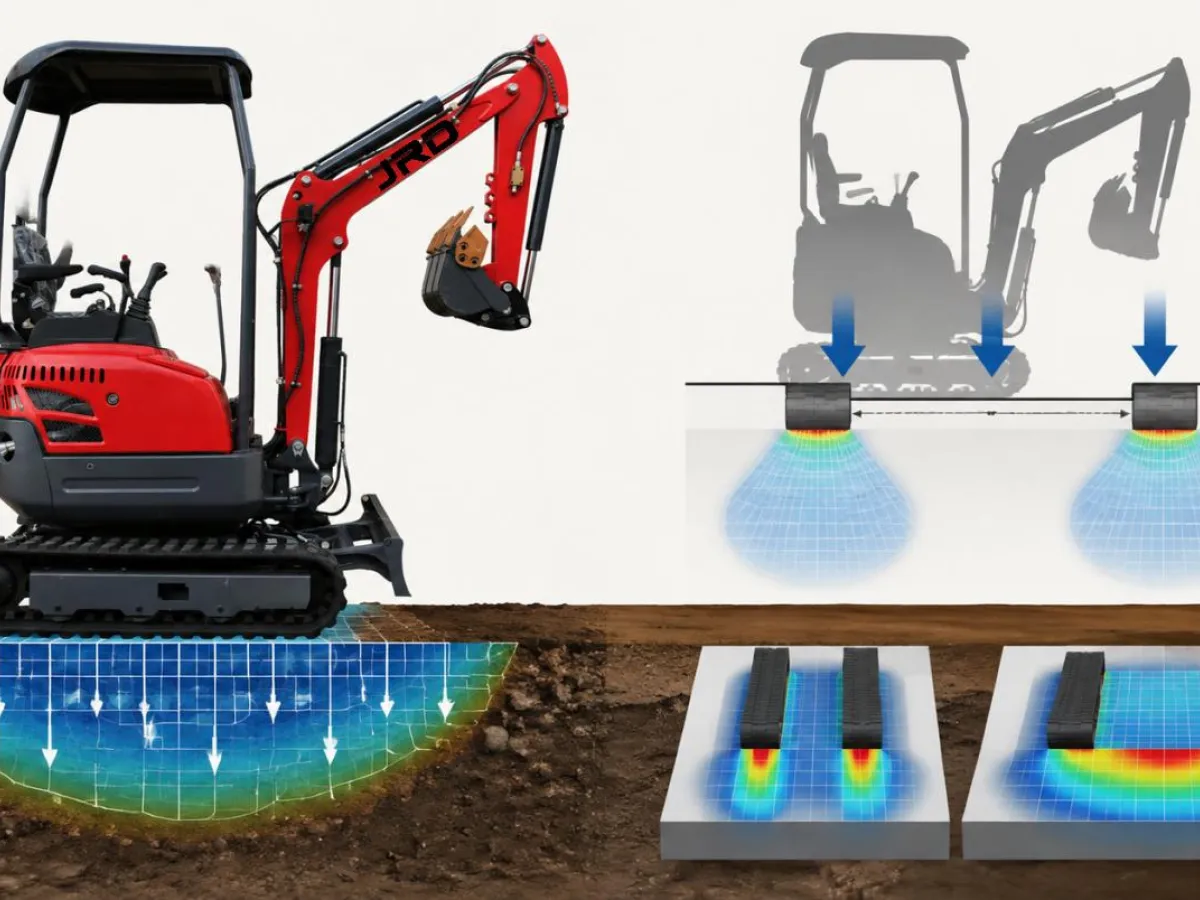
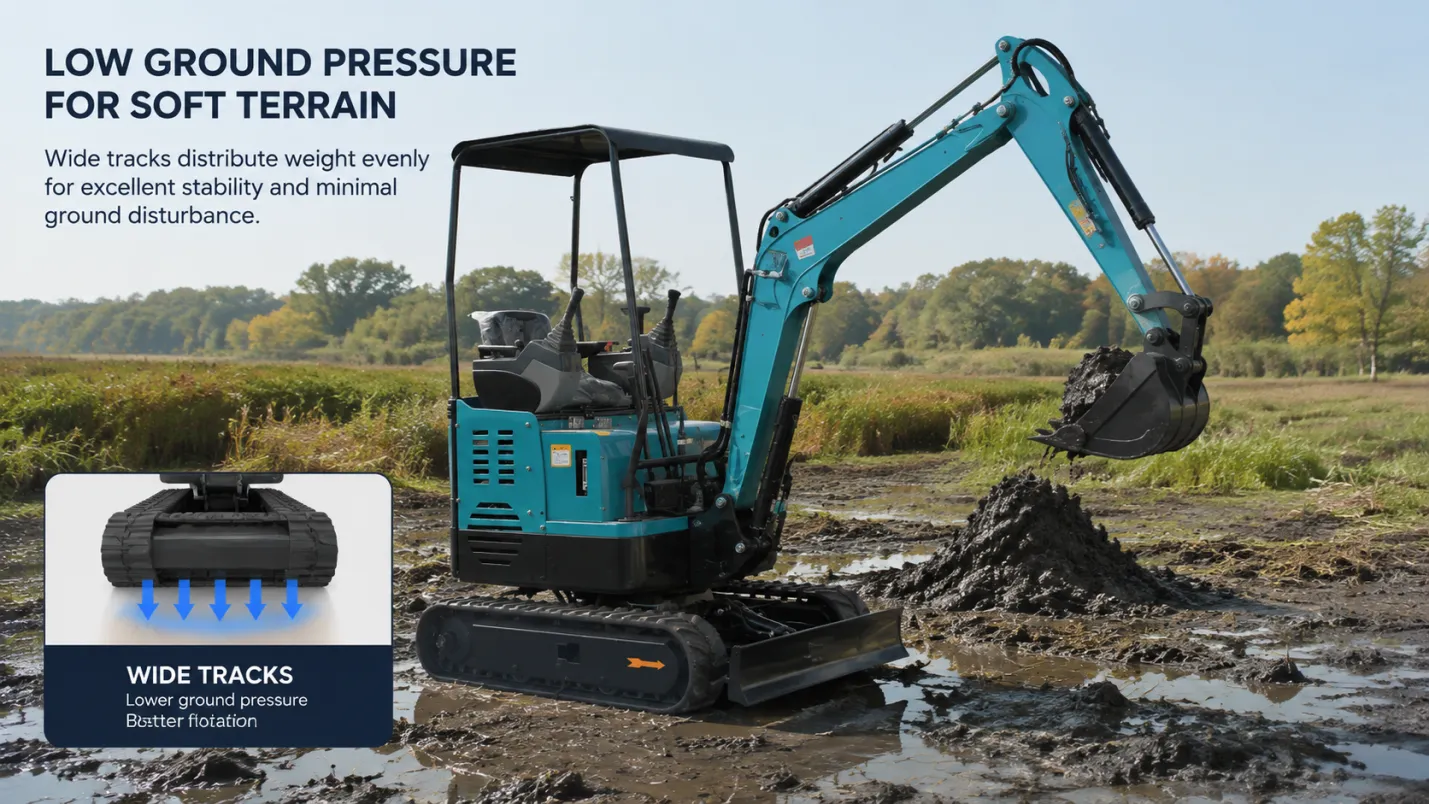
Ground pressure (also called contact pressure or track pressure) is the machine's weight divided by the track contact area. Lower ground pressure means less sinkage on soft soil. On a compact excavator, track width and track length together determine the contact area — the same machine on wider tracks has lower ground pressure and sinks less on soft ground.
Approximate ground pressure by machine class and track width:
06 series: 180–230 mm track width, approximately 18–22 kPa on nominal soil — among the lowest ground pressure in the compact class. Suitable for most soft ground work
10 series and 12 series: standard 230–260 mm tracks, approximately 22–28 kPa. Wide track versions (300 mm) reduce this to 18–22 kPa
15 series and 17 series: standard 300–320 mm tracks, approximately 28–35 kPa. Wide track option (350–400 mm) reduces to 22–28 kPa
18 series to 25 series: standard 350–400 mm tracks, approximately 30–38 kPa. Swamp/bog conditions may require temporary matting rather than track change alone at this class weight
Soil that can support a person walking (approximately 20–30 kPa bearing capacity) can typically support a 06 series or 10 series machine on standard tracks. For heavier machines in soft conditions, wide-track variants or temporary matting are the options to consider.
Track Selection for Wet and Soft Ground
Standard-width tracks: adequate for firm to lightly soft ground — typical residential and agricultural sites after rainfall. If the ground holds the operator's weight without sinking more than 50 mm, standard tracks are usually workable.
Wide-track options: available on several models in the range. The 16 series with telescopic undercarriage allows the operator to extend the track width in the cab — this machine can enter a site in compact mode, then widen its stance for stability on soft ground. No track change required in the field.
Steel tracks: provide more aggressive traction on slick clay surfaces where rubber tracks spin. However, steel tracks cause surface damage that rubber tracks avoid — on sites where the existing ground surface must be protected (lawns, established gardens, paved areas), steel tracks are not appropriate. Steel tracks are useful on demolition sites with rubble or in heavy-clay agricultural drainage work where surface protection is not a concern.
Temporary ground matting: for very soft conditions where even wide-track machines would sink, temporary ground mat panels (typically composite plastic or aluminium-topped ply) spread the load over a larger area. The machine drives on the matting; the mats distribute load into underlying soil. Required on peat bogs, estuarine clay, and highly saturated reclaimed land.
Mud Bucket Technique
Excavation in wet and muddy conditions requires a different approach than dry digging. Standard digging technique with teeth-forward penetration works less well in saturated clay — the material sticks, the bucket loads to full weight before the curl is complete, and efficiency drops.
In wet conditions:
Use a mud / dredging bucket: the open-profile mud bucket with no teeth loads saturated material at a higher fill rate than a general-purpose bucket. The open floor allows excess water to drain during travel, reducing the load per swing
Shorter cycle, smaller loads: rather than filling the bucket completely, take 60–70% loads and increase swing speed. This maintains cycle rate while keeping the load within the machine's hydraulic and stability limits on soft ground
Do not travel with a full mud bucket: a full load of saturated material at maximum reach with the machine moving on soft ground is the highest-risk combination for machine instability. Complete the slew and dump before traveling to the next position
Work from the uphill side: on sloped wet sites, position the machine at the upper edge of the dig zone and work downward — this keeps the machine on the more-stable upper soil and away from the saturated zone at the base
Clear the bucket between passes in sticky clay: clay that sticks to the bucket interior reduces net dig volume per pass. A back-drag pass against a clean section of the trench wall clears the bucket face before the next dig
Machine Entry onto Soft Ground — Assessing Before Committing
The most expensive mistake on a soft ground job is driving the machine onto a site without testing the bearing capacity first. A mini excavator that sinks to its undercarriage on a soft site is a recovery job, not a dig job.
Walk the route first: if your foot sinks more than 150 mm with your body weight, the machine will sink further. Do not enter without matting or wide-track preparation
Test with the blade: if the site is borderline, drive to the edge and press the dozer blade into the soil at full down force. If the blade sinks without resistance, the ground is too soft for direct machine travel
Check the water table: if free water is visible at 200–300 mm depth in a test hole, the soil above is likely near-saturated and the bearing capacity will be lower than surface firmness suggests
Plan the exit before the entry: if the machine enters soft ground, the exit path is the same way it came in — unless the job creates firm ground ahead. Confirm this before positioning the machine in the middle of a soft area
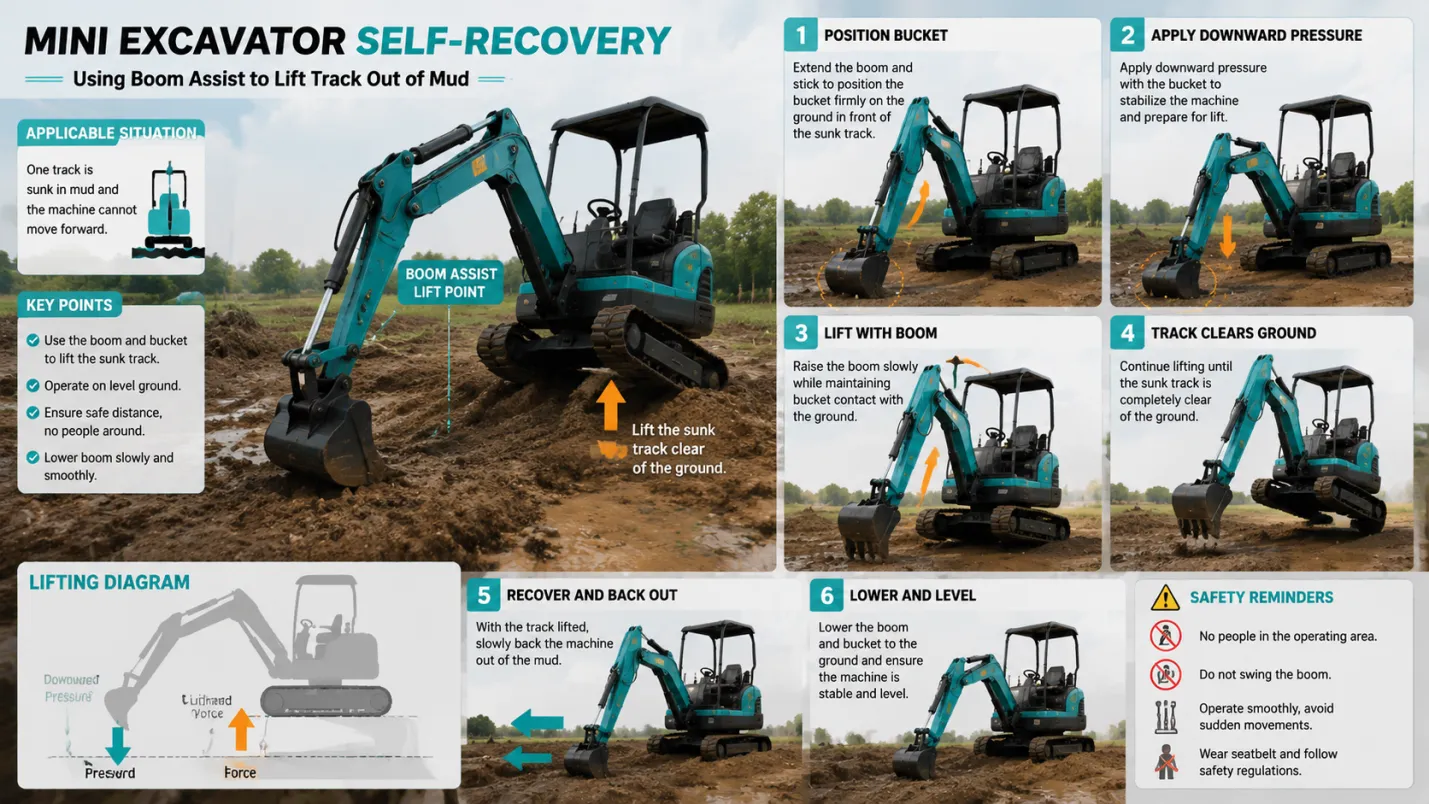
Self-Recovery — When the Machine Gets Stuck
Even well-prepared operations occasionally result in a mini excavator stuck in soft ground. The standard self-recovery procedure for compact excavators:
Step 1 — Stop immediately: continued track spinning in mud excavates the machine deeper. Stop travel the moment traction is lost.
Step 2 — Use the boom: position the bucket on firm ground ahead of the machine (or behind, depending on direction). Apply crowd-in (arm pulling) while simultaneously applying travel in the direction of the bucket. The boom acts as a fifth leg, pushing or pulling the machine out of the soft area. This is the most effective first-recovery method for compact excavators.
Step 3 — Clear material from under the tracks: if boom-assist does not free the machine, use the bucket to excavate material from under and around the tracks. Remove mud from behind the sprockets and around the idlers before attempting travel again.
Step 4 — Create a firm pad: if the machine cannot self-recover, excavate a pad of harder material from nearby and fill the immediate area under the tracks. Compacted rubble, stone, or timber can create enough bearing to allow recovery travel.
Step 5 — External recovery: if self-recovery is not possible, a second machine with a tow line or a dedicated recovery vehicle is required. Attach the tow point to the machine's dedicated recovery eye or the undercarriage frame — do not attach to the boom, arm, or bucket.
Protecting the Machine in Wet Conditions
Wet site operation accelerates certain machine wear patterns that require post-job attention:
Clean the undercarriage daily: packed clay in the undercarriage prevents correct track tensioning and causes accelerated sprocket and carrier roller wear. Pressure-wash or hand-wash the undercarriage at the end of each wet-ground day
Check track tension after wet operation: water and mud change the track's effective running tension — typically requiring re-tensioning after a wet-ground day
Inspect hydraulic seals: extended wet operation increases the rate at which water contamination enters hydraulic fittings. Look for water in the hydraulic oil at each service (milky or cloudy appearance) and sample oil more frequently in sustained wet-condition periods
Wash and dry electrical connectors: moisture in electrical connections causes intermittent faults that are difficult to trace. Blow-dry or allow to air-dry before restarting after immersion or heavy wash-down
Conclusion
Wet ground operation with a mini excavator is productive when the machine is correctly specified — right track width, appropriate bucket type — and when the operator respects the soft ground protocols. The machines in the compact class have among the lowest ground pressure of any mechanised earth-moving equipment, which makes them the right choice for many wet-site applications that would destroy the ground surface with heavier equipment.
Assessment before entry, matting where conditions require it, mud bucket technique, and a clear self-recovery plan are the operating disciplines that keep wet-site work on schedule. The machine is capable — the approach determines the outcome.
Contact Us
Choosing the right undercarriage is only half the battle—ensuring your mini excavator performs shift after shift starts with a conversation tailored to your terrain, your access points, and your daily work profile. Whether you need a compact 660 kg machine for narrow doorways or a telescopic-chassis 2,100 kg model for sloped, mixed-surface sites, our team helps you match the right track configuration, tensioning routine, and travel speed options to your real-world conditions.
Get in touch for expert advice or a quote:
Email: info@jrdmachinery.com
Whatsapp: +86 136 9536 6564
Website: www.jrdmachinery.com